PlayingThe style king who goes against the trend of the environment.
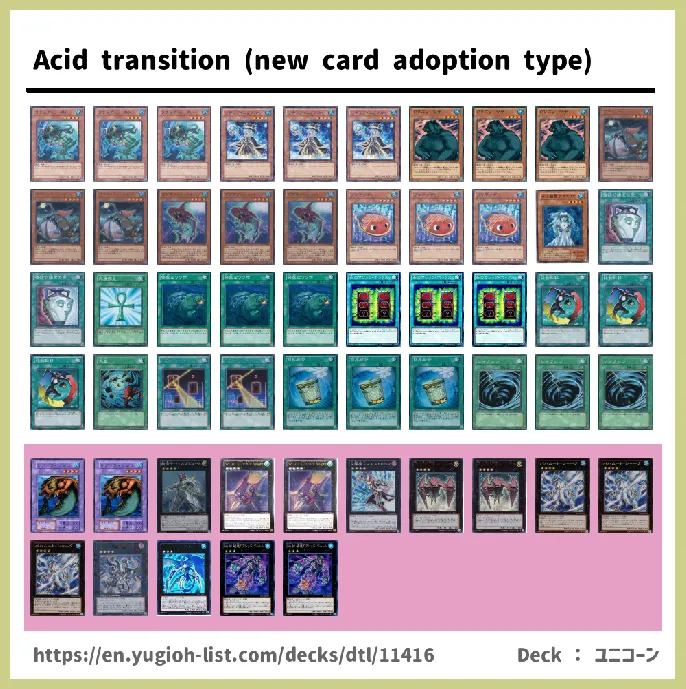
Yes, it's a Rank 4 Dramatic Enhancement Festival, so this time I'd like to introduce a modified and enhanced version of the "Acid Transfer (moray type)" that I made before.
As you all know, Rank 4 has evolved quite a bit now thanks to broken cards like No101 and Evilswarm Butte. Along with that, "acid transfer" has become a field where you can fight normally as an environment other than relying on transfer, so I posted it.
The method of turning is the same as the previous explanation, but since there are some parts that are slightly different due to the addition of new cards, I would like to explain from the beginning again.
I hope this will increase the number of people who are interested in acid transfer. .
StrengthThe basic attack method is to create Bahamut by arranging two of his WATER level 4 monsters, and use the effect to send Ashigo, which has no materials, to his opponent with a special summon or a box.
At this time, you must have at least one monster on the opponent's field in order to send it, so be careful.
With this, you can unilaterally inflict the demerit effect of Ashigo on the other party by sending Ashigo without materials. In this way, the concept of this field is to block the opponent's Special Summon and win with 2000 burns every turn.
: Pattern to align two level 4
In this deck, all of his level 4 is his WATER, so Bahamut can special summon 100% if he has two level 4s. So let's take a look at that pattern.
・ Hand Beast GY Aerial (Beast): Beast Summoning Effect GY to Aerial (Beast) ss
・Hand 《Tin Goldfish》, WATER level 4 monster: Goldfish summon effect WATER level 4 monster ss from hand
・Hand 《Silent Angler》, WATER level 4 monster: WATER level 4 monster summon, angler effect ss from hand
・ Hand 《Instant Fusion》, WATER Level 4 monster: Level 4 monster summon Simple activation 《Rare Fish》ss
・ Hand 《Instant Fusion》, 《Silent Angler》: 《Instant Fusion》activation 《Rare Fish》ss Angler effect ss from hand
・ Hand 《Double Fin Shark》GY 《Silent Angler》(《Rare Fish》, 《Double Fin Shark》): Double summon effect Choose one of three types from GY
・Hand 《Mother Grizzly》, Aquaria: Mother summon Suicide effect on opponent monster His WATER level 4 monster of 1500 or less from Deck ss Aquaria effect Mother exclusion ss
With the addition of the new cards 《Silent Angler》and 《Double Fin Shark》, Bahamut has become even more stable.
The last combo with Mother and Aquaria requires an opponent's monster, but in the first place, an opponent's monster is needed to transfer Ashigo, so I don't think it will be a problem.
: A pattern that aligns four level 4
Thanks to the appearance of Angler, it became even easier to get a level 4 x 3 rank 4 with this deck. In addition to that, if you do well, you can align four level 4s, so you can line up two Xyz.
・ Hand 《Silent Angler》, 《Instant Fusion》, Beast GY Arial (Beast)
: Beast summon effect GY to Aerial (Beast) ss → Angler effect ss Simple effect Rare fish ss from hand
・Similarly, if there is an angler, if there is a simple, the situation is the same if two level 4 can be lined up. (Goldfish, WATER Level 4 Monster) (Double Fin, GY Angler (《Rare Fish》, Double Fin)) (Mother, Aquaria)
With this, you can call another Rank 4 other than Bahamut, so you can take away troublesome monsters with effects with No. 101, and you can safely send Asago while turning them face down with Mae Stroke.
In addition, even if Bahamut is negate by the opponent's veiler or trap, you can get another Bahamut with this, so you can increase the chances of sending Asago.
: A pattern that aligns all level 4
By adding aquaria to the above pattern, you can also arrange all five.
・Hand Aquaria, 《Silent Angler》(《Instant Fusion》), Beast GY Arial (Beast)
: Beast summoning effect Aerial (Beast) ss → Bahamut ss effect with two bodies Send with transfer or something with Ashigo ss → Aquaria effect Exclude the material of Bahamut removed earlier ss Angler effect ss Simple activation from hand 《Rare Fish》ss
・If there are WATER level 4 monsters left on the field due to the mother effect and Arial's high defense power, he will also be five in the same way with one of the "patterns of arranging four level 4 monsters".
・If the monster you stole from your opponent is level 4, you can do it without any of Aquaria, Simple, or Angler.
With this, after sending Ashigo with Bahamut, you can call a level 4x3 rank 4, so let's put out a shock ruler and create a strong lock.
*Be sure to Special Summon “Angler” after “Aquaria” Special Summon. Angler will not be able to Special Summon monsters from his hand after Special Summon, so he will not be able to put out Aquaria from his hand.
If you don't want to make a mistake, if you are conscious of using Bahamut in deployments other than using Angler (simple & WATER level 4, goldfish & WATER level 4, etc.), even after removing the material and sending out the reed with the effect I think it's good because it meets the Special Summon conditions for Aquaria and Angler.
In the return turn, if there is a level 4 WATER that was put out as a mother or an Arial with a high defensive power left on the field, you can Xyze a level 4 x 2 rank 4 up to three times. (If there is no Arial (Beast) in GY, you can use Goldfish and WATER Level 4 monsters instead of Beasts in your hand.
: Tips on how to stand and turn
● Regarding deployment
・Basically, this field requires an opponent's monster, so you can't move on the first turn of the first attack. So, on the first turn, use Kyoken and Moray to turn your hand as much as possible, and if you can, set "Mother" or "Ariel" and end it.
Mother especially wants to go down if he can go down on the first turn. If the opponent is a mass deployment type one shot kill, it will be a wall. (If he has enough WATER in his hand, I think it would be a good idea to put out a Mae Stroke that also has effect destruction resistance.
・It is important to be aware of the development that uses summoning rights as much as possible. For example, if you have 《Instant Fusion》, Angler, Beast in your hand and Arial in his GY, if you use the summoning right to deploy Beast first, you can target Beast when Veiler is in your opponent's hand. can be done.
If you use Veiler here, Angler can easily use Bahamut without any problems, so the damage will be less than if Bahamut hits Veiler.
After that, he simply wants to save the level 4 that he can special summon for the level 4 x 3 rank 4 of rulers, so it's a waste to use it here.
Due to the situation of the field, it may be better to start with the one who can Special Summon, but in that case, it is necessary to pay attention to the effect of Double Fin, especially since he cannot use a ruler after Special Summoning.
・If you have Angler and Simple in your hand that can be deployed with Special Summon, and the only other monsters are Ariel or Grizzly, it may be better to leave Ariel or Grizzly in your hand and deploy Rank 4 with Simple and Angler.
In particular, Arial can search for Beasts in reverse, so if you deploy Bahamut without using the summoning right, even if it is negate, you can use the remaining summoning right to turn this card face down, which will lead to the development of the next turn. . (In the case of Mother, it doesn't directly lead to the next development, so if you want to leave it as a wall with a good presence, I think it's a good idea to use this method of development.
・When activating Moray, pay attention to the priority of her WATER monsters in your hand.
If you have 3 or more WATER monsters in your hand, it's a good idea to keep Aerial or Mother in your hand in case you can't deploy it with your hand after switching (because you can connect the field if you set it). Especially after using Kyoken, I know that I can't play it, so it's better to keep one of these two.
If you're not using Kyoken, I'd like to keep it in my hand as much as possible. I think it's the card I want to keep the most because I can deploy any of him in the hand exchange after that, even if it's a WATER monster or a simple one.
If you have Simple in your hand, you can use Moray generously as long as you can activate it. Just like Angler, any WATER monster can be deployed.
Other than that, I think it's good to leave the goldfish.
・This time, it's much easier to get a level 4 x 3 rank 4, so if possible, you can effectively use the ruler to limit the opponent's movement before using Bahamut.
It depends on the Deck, but in most cases, if he goes first and puts out a Ruler, he can declare a Spell to suppress the opponent's deployment, so most of his Decks summon monsters and set several backs with this. It will be the flow of the end. With this, on your return turn, you can declare a trap with the ruler at the beginning, so you can safely send a ashigo from Bahamut.
Even if the trap is chained by the ruler's effect and the ruler is destroyed, the trap limit effect will remain, so Bahamut can be deployed safely.
・When you endure the opponent's attack with Mother, the last monster to be put out by the effect should be a monster that he can Special Summon later with Beast or Doublefin. So Aerial, Angler, and Double Fin are good, but Angler is a valuable Special Summon monster, so I think Aerial and Double Fin are good, depending on your hand.
・If you have Double Fin in your hand, even if you have a Simple Goldfish and a Goldfish, do not Special Summon Double Fin with a Goldfish. let's
Since 《Rare Fish》is a level 4 Fish, it can be revived by Double Fin. So if you keep Doublefin in your hand, you'll have more chances to get Rank 4 again. (The same thing can be said when it's not Kingyo but his other WATER level 4.
・As in the above combo, if you use both "Aquaria" and "Angler" in one turn, Aquaria must be the first to Special Summon. Angler's effect is the same as Bahamut's, it only prevents you from performing a Special Summon from your hand "after using the effect", so if you put out Aquaria first, you can also put out Angler without any problems.
・If you have no mother, Ariel, or Goldfish in your initial hand and cannot deploy, keep your hand without moving and return the turn. In this environment where you have two Goes and many Buttes, it will be difficult for your opponent to carelessly deploy a large number of them, and the possibility of being one-shotted is quite low. (However, if you use Kyouken or Moray, it may be a little dangerous in that case, as his Deck internal usage may be exposed.
・If your opponent goes first and lays down two or more cards and also brings out a monster, you should aim to play his Evilswarm Butte first. (However, only when there seems to be room to get Rank 4 other than Butte.
If you succeed, you will have an advantage in terms of adding two cards, and after that you can direct destruction cards to Butte, making it easier to summon Bahamut. (If he is stopped at the stage of two level 4 monsters before sending out Butte, that means he let him use his spell trap, so it's fine.
● When sending ashigo
・Unlike Black Corn, Bahamut Shark's effect doesn't say "the turn in which this effect was activated", it just prevents you from attacking after the effect is activated, so there is no problem even after you attack. Special Summon effect can be activated.
So, if there are two or more monsters on the opponent's field and you can't narrow down the target such as transfer, destroy one with Bahamut Shark before activating the effect (or if you're winning in RBI, Xyz You can attack with the two bodies before moving and reduce the targets you want to transfer or destroy with the box as much as possible), and you can make it easier to activate the transfer after that.
・Let's make monsters that can be used as materials to be removed by the effect of Bahamut etc. to be profitable later. If I make Bahamut with Angler and Mother, I will remove the Angler who can special summon with double fin later, and if I made Bahamut with Tin Goldfish and Aerial, I will remove the Aerial that can Special Summon with Beast later.
Due to this relationship, when you summon Bahamut using Angler or Simple, the other monster that Normal Summons is Arial (Beast) if Beast is in your hand, and Arial is left for search if Beast is not in your hand. In this Deck, it is also important from an advertising point of view to change the summoned target according to the situation, such as summoning a mother or the like.
・When sending Ashigo to your opponent, if you have both Transfer and Box in your hand, use Transfer first. If you leave the box in your hand, you can use the box effect to turn the monsters your opponent put out after sending the ashigo into ashigo, so you can line up two ashigo on the opponent's field. (Even if you want to send another one, if you activate Transfer while Ashigo is in the opponent's field, you will end up exchanging Ashigo and Ashigo.
However, 4000 burns is certainly strong, but since it means having two monsters on the opponent's field, it can easily be dealt with by Tribute. So it's good to actively aim to send two ashigos, but if you do, send the second one when the opponent's LP is exactly 4000 remaining, so as not to give them time to Tribute. I think it's good.
・I think it would be better for him to send a ashigo in Attack Position. In the previous Deck, I explained that it is better to send in Attack Position in order to protect the ashigo sent from the opponent's braho with "Safe Zone", but there are also people who do not understand the effect of ashigo unexpectedly. If you send an attack position ashigo, it will impulsively try to attack with a ashigo that can not attack because there is no material.
With this, you can have a chance to make the opponent's battle phase swing once, so I think you can keep it in mind.
● After sending Ashigo
・Let's try to destroy the monsters set or summoned by the opponent by battle with the remaining Bahamut etc. so that only Ashigo will be on the opponent's field after the Ashigo transfer.
Recently, there are many decks containing monsters that require two Tributes, such as level 8 or level 7 (especially Dragon Ruler, which can be included in many decks), so it is possible that Asago will be processed in the form of Tribute. Thinking about it, I would like to destroy monsters other than Ashigo so that the Tribute factor can not be aligned as much as possible.
・Don't carelessly summon monsters until you've successfully sent Ashigo to your opponent, and you don't have a card to break if your opponent sets his Spell Trap. If the torrent burial etc. is lying down, all the ashigo will be destroyed.
In that case, it would be good to have Recruiter's mother face down, who can perform his Special Summon during the damage step, such as Arial, which reverses the opponent's attack and activates its effect on your turn, and Torrent Funeral, etc., which cannot be activated on your turn.
・Aim for ruler summons aggressively after Ashigo transfer. If his Spell Trap is face down on the opponent's field, it's better not to move poorly, but if not, I think it's a good idea to bring out the ruler and make a strong lock with his Spell or Trap declaration. (Absolutely do not declare monsters; when dealing with Lilo and the like, you will want to declare monsters no matter what, but if you do so, Ashigo will not be able to activate the burn effect.
If you put it out when the opponent has no back, declare "Spell" and use Braho or Book of the Moon that is likely to be activated to deal with Ashigo during the opponent's turn.
Even if you declare a trap, it will be chained, so you might think that the ashigo will end up being dealt with, but on the contrary, you can invite the opponent to activate the trap with the effect of the ruler, so you can use the effect of the ruler. In this state, even if Ashigo is processed by Sambre etc., the opponent cannot activate other traps afterward, so you can decide to attack directly with Ruler and Bahamut on the opponent's field that has become empty to process Ashigo. (If the ruler is destroyed by the trap, the ashigo will remain after all, so it's fine to use it as a decoy.
If Ashigo's first burn is effective, you can overcome it by summoning an appropriate monster, so I think it's good to keep in mind that you can beat it by hitting other than Ashigo's burn.
・If you have Cyclone in your hand after Asago Transfer, it is recommended to set it. Of course, he is afraid of spells when dealing with Asigo, but it can also be dealt with by traps, so I think it's safer to set up to crush the opponent's prone back with End Cycle so that it doesn't get chained.
・If Ashigo has been dealt with, if you still have transfer or box, aim to transfer acid with Bahamut with remaining materials, and if not, use Nightmare and fight as a beat. (Even if you use Nightmare, attack with Bahamut and Special Summon this card. If your opponent sets only wall monsters in the next turn, use Nightmare to destroy the wall monsters.
Here is the explanation of the card.
《Gishki Beast》. You can search from Arial and Beast as well as Arial, he can Special Summon from GY. Summoning Bahamut, which has the restriction of WATER, is less fast-acting than sending his Deck to Fish, but it consumes less cards.
Anyway, the point of this Deck is how you can deploy without consuming your hand, so I think Beast fits in that sense as well. (If you use Cyclone or Naisho to destroy the opponent's bag until you send Ashigo, even if you can send it, you may only have 2 or 3 cards left in your hand, so a gimmick that can be deployed with a small number of cards is essential. .
《Gishki Ariel》. His ability to search for Beasts from his deck is particularly appealing due to his high defensive power. The 1800 defense in his Deck of the series is one wall that is difficult to destroy with monsters that can Normal Summon, so if this card remains on the field without being destroyed, search for Beast and use another card in your hand. It can be deployed at his WATER level 4.
With this, one beast can earn the equivalent of one rank 4, so it also contributes to ad acquisition.
《Mother Grizzly》can recruit everything except Aquaria with this deck. By continuing to recruit yourself in battle, you can use it on the wall, so it can also be used for his deck that can be deployed in large numbers.
It works especially well with 《Creature Swap》, and if you destroy this card with the opponent's monster you stole by putting this card in Attack Position and transferring it, it will recruit monsters to your side, so you can continue with Special Summoned monsters. Attacking with a dagger guarantees you to deal battles damage. It's a pretty good card that doesn't get caught in the abyss and only in battle, so I'm using 3 copies.
《Tin Goldfish》. Although it will be deployed by consuming a lot of cards, it has a quick attack. This time, with Angler's success, Veiler won't be that much of a threat, so I think it will be the cornerstone of the development.
Since the defense is high, you can set it as a wall like Arial and Mother on the first turn when you can't deploy. (However, in that case, only when you have room to expand your hand with other cards.
《Double Fin Shark》is a monster with the same effect as his WATER Fish target Beast. In the case of this Deck, you can target this card itself, Angler, and "Rare Fish" that you simply put out.
Besides Beast, I wanted a way to get Rank 4 by using one card from my hand, so the appearance of this card is quite dramatic.
However, the downside of this card is that you cannot Special Summon monsters other than his WATER on the turn you activate this effect, so if you use Mae Stroke before activating this card, the effect will activate. will not be possible. Of course, even if you use this card to align three level 4s, you can't get a ruler out.
《Silent Angler》. That's one of the reasons why I decided to make Deck this time. Thanks to this card, it's really easy to put out rulers and the like, and the success rate of ashigo's transition has increased.
When it's in your hand together with Simple, you can deploy Rank 4 without using summons, so you can deploy Bahamut while kicking out troublesome monsters with Ark Knight, or bring out a second Bahamut and use insurance such as Veiler. can be made
I wanted to personally introduce the development of Aquaria, the spirit of water, so I put a pin into it. (After all, if GY doesn't have any monsters in the early stages, and he can't Special Summon even with goldfish, if this card comes, there will be a slight accident;
However, he is a valuable monster that can be Special Summoned when other cards have been confirmed, so I don't think he can be used at all. (When playing this card, try to exclude Goldfish and Mother who are not eligible for Beast or Doublefin's Special Summon.
As I wrote above, you need to be careful when using it with an angler.
《Moray of Greed》. Thanks to the increase in his WATER, which is easy to connect to Rank 4, such as anglers and double fins, he was able to put in more WATER than last time. That's why I used 3 of them in his deck, which quickly needs key cards such as transfer, box, and cards that can break the opponent's back. (The key card also includes the meta card replaced from the side.
Of course, Moray can be used in the first half of the game when all the key cards are arranged, but after sending Ashigo, he may not have WATER in his hand, so after that, it may just become a cause of accidents. So, depending on who wants to change it, I think it would be good to change his deck's tendency, such as adding Car D to make it a trap-oriented type. (Recent environmental decks require quickness, so I chose Moray eel, which is more likely to move even if you attack second, rather than Car D, which delays you by one turn even if you attack second.
《Mystic Box》and 《Creature Swap》are required. The effect of the box is targeted, so it is easy to misfire, and it cannot be used against monsters that are resistant to targeted effects, but you can choose which monster to replace. The transfer effect does not target, but you cannot choose which monster to replace. These two cards can be said to have good basic synergies, such as sending a Recruiter and destroying the sent monster (Grizzly in the case of his deck) in battle to create an ad here. I think you can fight normally by making good use of the difference. (An effect that targets a box does not trigger if either or both of them leave the field when the effect resolves. If you no longer receive the effect, only one will be processed.
《Monster Reborn》. It's a stable card, but since it's a card that can't be used even if it comes in the first half, it may be a hindrance to development. However, in this Deck, where you want to maintain the front line with a small number of cards, I think it would be better to have this card that can take away strong monsters from the opponent's GY, etc., which can also buy time.
I think 1 storm, 3 cyclones, and 2 《Night Beam》cards that break the opponent's back are good. It's easy to get into your hand because it's a moray eel.
If you have a Cyclone in your hand, it's good to go first and go face down with a set monster as a bluff, but if your opponent's Cyclone destroys it, you'll lose valuable back-smashing cards, so send the basic ashigo. I think it's better to keep it in your hand until then. (If you have two other secret cards in your hand and you have plenty of room, you may be able to face down.
《Instant Fusion》. It is a key card that supports his Deck with Angler and two pillars. His Fusion Monster, which is activated by this card's effect, cannot fight, so use it only for Xyz.
The monsters that are summoned by this effect are treated as fusion summons, so I'm casually happy that they don't get hit by resurrection restrictions.
《Pot of Duality》. If possible, this is a card that you want to activate first. If you attack second and come in the first hand, if you have a hand that cannot be deployed, you will be delayed by one turn. However, I think that this card will come in very handy because I don't often do Special Summons after sending Ashigo.
The reason why I put two pieces is to make it easier to draw moray eels. If your hand is stuck with his WATER monsters, it will be difficult to aim for Acid Transfer if Moray eel does not come, so if you use Kyoken to make it easier to attract Moray eel to your hand, you will be delayed by at least one turn. Accidents can be avoided to some extent.
Even if you can't do a Special Summon, if you have Transference in your hand, you can swap the opponent's advanced monsters with an appropriate monster. (In this case, you will need another card to send Ashigo;
《Rare Fish》. It is WATER level 4 that comes out from 《Instant Fusion》. If Doublefin is in your hand, I'd like to deploy this card and his other WATER level 4 first.
I don't use all 3 simple cards, so I think 2 extra cards are fine.
Ouroboros is included because it can be used for various purposes and has high responsiveness.
shock ruler. Raise the lock power by putting out after sending the ashigo. This time, since it's easier to get a level 4x3 rank 4, I've been able to efficiently use it to suppress the opponent's deployment before sending Ashigo, so I've included two copies. (If the opponent is a biased deck, you can use two rulers to completely lock the opponent, so;
You can lock for 3 turns, so you should be able to decide the game before all the materials are gone. (It may seem persistent, but never declare a monster while Ashigo is on the opponent's field.
No.101S・H・Ark night. It is one of the environmental destruction. In Attack Position, he can only target monsters that have been Special Summoned, but with a versatility rank of 4, this ability to respond is a pretty strong card. In the future, I think that there will be many cases where Ark Knight steals Ark Knight.
It's a nice card for Asago Transition, which had low response, but it has versatility that can be used in other decks of his, so when using this card, you need to think a little about playing. increase.
One way is to give up 2100 battles damage and Special Summon this card in Defense Position for the purpose of removing only the opponent's monsters. With this, it won't be stolen by Arknight again, and since this card is resistant to destruction, it works well as a wall.
Basically, it is better to use it only for the purpose of removing the opponent's monster like this.
Assuming that you can fight normally by changing sides, I put two cards from the main in the extras. (When fighting as an acid transition, it is rare to use two copies;
Evilswarm Butte. It's the second stage of the environment destruction card. Since it's a triggered immediate effect, it doesn't interfere with removal by things like abyss, and it doesn't destroy itself. However, since it has been ruled that effects can only be activated once on the same chain, it is now possible to deal with this by chaining cards that negate effects such as Veiler, Demoche, and Breakthrough.
However, like Arknight, this card is also an amazing card that your opponent will use, so you need to think about how you play it.
The amazing thing about the effect in the first half is that when both players have a balanced hand and the opponent doesn't consume even a single card from their hand, they can go face down on the field, so this is a Butte Summon and an Xyz. Because two cards become one, at least the total number of cards in the field with the opponent and the total number of cards in hand will be -1. So in this case, you can almost certainly activate the effect of Butte.
Of course, when summoning Butte, if your opponent uses a card like Thunder Break or triggering your hand to adjust your hand due to a "cost", you will not be able to fulfill the activation conditions for Butte, so you may not be able to chain. However, there are probably few such cases, so I think that his decks such as HERO and Evilswarm that can knock down traps are cards that you have to be very careful about.
The effect in the second half, "It can be activated during the Battle Phase during the opponent's turn," can be used to trigger a Must Counter to ensure that the opponent uses a card to remove this card.
Well, basically, I think it's better to Special Summon this card in Defense Position so that it won't be stolen by Arknight. Either way, the turn you use this effect will cause all battle damage to your opponent to be 0, so there is not much point in using it in Attack Position. If you don't do it, it won't happen, so considering that monsters don't increase in the opponent's field, I don't think it's too much of a concern to leave 0 defense on the field.
Mae Stroke can be used as a wall when the first half is too uneasy. You can use it like activating The most used is as a wall that can withstand attacks up to three times purely after ashigo transition. (Very useful against Bujin etc.
The versatility of its single use has been lost to Arknight, but since it can also target monsters that have been Normal Summoned, I included one copy.
Acid Golem. If you play this card and prevent transfer or box, you will be affected by the disadvantage, so try to play it when the opponent does not have a spell trap as much as possible.
I think that two cards are enough because I can fight other than teleportation.
Nightmare shark. By playing this card with the remaining Bahamut materials even after Asigo is processed, you can fight normally with beats. After the opponent uses a card to deal with the ashigo, this card is useful because it allows you to increase the number of monsters on the field without using the card.
Unlike Revise, you can attack directly even if you don't have materials, so I think it's worth including just one copy of this card.
WeaknessA Deck that makes heavy use of Tribute in releases such as Hijiri, Monarch, etc. Skidre. Flip Monster. A deck that can be attacked without using Special Summon.
Thanks to Angler and others, Veiler is no longer scary, and his deck, which is full of traps and guns, has been alleviated as a weak point thanks to Butte. (Exclusion may still be a bit painful;
His Deck will go up as he uses Tribute as a representative, so if you really care about it, you should use 《Mask of Restrict》.
Skidre negates the effect of Ashigo...; It's a little tough for this Deck to have 3000 RBIs after the burn effect disappears. .
So to prevent this from happening, set the cyclone if you have one after sending Asago so that you can chain cycle.
Casually vulnerable to Flip Monster. . If the monster set by the opponent after sending Asago is Morphing Jar #2, with this deck, the only way to deal with monsters in the back Defense Position is to destroy the effect with the box or return it to the hand with Ouroboros. There are cases where it will be activated because there is no. (If it's a ruler, you can't declare a monster for Ashigo.
However, I'm afraid of being knocked down again, so if you're worried about the monsters you set, I think it's a good idea to put Diamond Wolves on your side. (However, in the recent environment, I think there are only a few monsters that can do Flip Monsters and Normal Summons that have the effect of sentimentalizing monsters on your field, so I personally don't want to use one extra frame because I'm worried about this. I think it's subtle, but the thing that worries me the most is Raikou in the current environment.
"Ghostrick" is a representative deck that attacks without special summoning.
In addition to being hindered by things such as Nekomusume and effects that make it a back defense, the Burn effect of Ashigo, which was sent with great effort, is also halved with 《Ghostrick Mansion》. What's more, the opponent develops with Mummy, etc. that increases the "summoning right" and cuts down on his LP with a direct attack, so with only Ashigo's 1000 Burn, his LP will be higher than his LP. It will be gone. (In the worst case, you can deal with Asago with 《Ectoplasmer》;
Therefore, 《Deck Devastation Virus》is a must-have card for the side in order to support this deck. Fortunately, his Deck over there can't get Rank 4, and he can't put in a Crazy Box, so it's difficult to use Darkness and Magic Decks on the side. So I don't think it will return the meta. (If you use Ghostrick's Darkness Deck, your opponent will probably use sin Stada.
Just for the record, the Heraldic Beast, which will become more popular in the future, has a "Twin Headed Eagle" that revives materials, so it will increase the materials of Asago. So I don't want to send this monster to her GY as much as possible. (As a countermeasure, there is a way to put all Bahamut on defense so that they don't get suicidal suicide attacks. Well, even if you have more materials, you won't be able to perform a Special Summon, but after all, the RBI will suddenly drop to 3000. It hurts to start moving and lose the burn effect;
CustomizeIf you care about the cards in your hand, it's better to put in a salvage, but after all, when you try to turn this card around, it's an accident factor if you get it in the first hand. Since it becomes a deck of 4, I can not catch up with the opponent's development and I can not make use of Ark Knight etc. (Above all, it is often too late even if you can send a ashigo;
So, since he can recover two of his WATER monsters from GY, I think it's a card that can be included even considering the use of making moray eels that come into the hand in the second half less likely to rot. (Or rather, there is no frame to put two;
In matches, the opponent may be cautious and not summon monsters after the second match, so if you want to actively send Ashigo to some extent, Kuroba, which can revive Goldfish and Angler, and 《Ojama Trio》on the side. I think it would be good to put it in.
Even with three level 4s after the double fin effect, it's a bit sad that he can't get a level 4x3, so it might be interesting to add a WATER rank 4 "Shark Drake" to him.
If you don't want to include Moray, I think it would be good to increase the number of traps and make him a deck centered on Car D. In that case, 《Safe Zone》is recommended because it works well with rulers. For defense, 《Bottomless Trap Hole》, “Torrential Funeral”, and 《Waboku》are good. (Detailed explanation of Car D-axis is given in the previous post, "Acid Transition (moray type)".
If you feel that Aquaria will cause an accident in the early stages, you can add "Bubbleman" or "Revival Slime". (I think it's better not to reduce the number of monsters as much as possible for the sake of moray eels.
Personally, I think the resurrection frame is the point where you can change it the most, so if you don't have enough techniques to destroy the back, you can put in another secret copy, or if you care about adding cards to your hand, " Salvage", or if you want to make it easier to activate the effects of Beast and Doublefin, you can put in 《Foolish Burial》.
:side
1 x Crazy Box
Black Corn × 1
《Abyss Dweller》×1
《Deck Devastation Virus》×3
《Eradicator Epidemic Virus》×3
Soul drain x3
《Stygian Dirge》×3
The Crazy Box is a vehicle for activating the Darkness Deck. Rank 4 is easy to put out, so if a Magic Deck or a Dark Deck comes, you can activate the effect immediately.
Black Corn is a monster that destroys normal summoned destruction resistance (marshmallows). As with Flip Monster, this Deck has no choice but to deal with destruction resistance with transfer or box, so you need a card that can be destroyed especially if you can't send Ashigo and fight normally.
《Abyss Dweller》is in the Dark World and Mermail metas. Like the Crazy Box, it's Rank 4, so you can put it out right away. With this Deck, which can always use WATER as an Xyz material, he can also use the effect of increasing ATK, so of course, this card itself will raise his ATK to 2300, so it will not be a normal summon monster. Almost indestructible.
《Deck Devastation Virus》is a meta of "Ghostrick" that will be used a lot in the environment in the future, as I wrote in the weak point. (It also sticks in the Triaxial Brotherhood of the Fire Fist.
《Eradicator Epidemic Virus》is a one-kill or special win meta. Exo and Countdown tend to be biased towards his spell traps, so a successful activation will almost always win.
This deck can mediate Crazy Boxes and Ouroboros from the side.
Soul Drain is in the Dark World/Mermail meta just like the Abyss. Dragon Ruler also sticks. Also, Abyss and Soul are strong against the upcoming new deck, "Sylvan", so I put them in the sideboard.
"Stygian Dirge" is a card that was adopted because of the broken environment of Rank 4 this time. If the number of rank 4 main axis increases, I can seal Xyz with this card alone, so I think it will be easier to fight to some extent.
If you want to switch side and main, I think it's good to use Resurrection, 《Night Beam》, Strong Ken, and Aquaria slots. The extras are one each for Ouroboros, Ruler, and Arknight.
I think it's better not to replace the moray eel. If you don't put this card in, the Deck won't rotate, so the meta card you put in will be difficult to function. It's tough when it comes to competition.
*I don't think it's necessary to insert 3 Metacards at a time when playing sideboards, but when you think about accidents when cards overlap in your hand, it's actually not necessary to put 3 metacards into your hand. It didn't come and didn't act very meta.
However, this is my personal opinion, so if you don't think it's necessary, I think it's better to put two cards each and put another card such as Mask of Restrict in the empty side slot. (Only the Magic Deck is really afraid of Ghostrick, so I think it's better to throw in three sideboards.
:lastly
Stair transition is a very interesting field that doubles as a psychological warfare with opponents, so I would be very happy if this deck could serve as a template for telling you about it.
I tried to explain it so that it would be easy to understand for people who are trying to do acid transfer for the first time, but if you have any questions, please feel free to contact me. . See you soon. . |
 WORLD PREMIERE PACK 2026
 REVOLUTION BOOSTER Toon Witchcrafter and Unchained
 CHAOS ORIGINS
 LIMIT OVER COLLECTION THE RIVALS
 THE VALUABLE BOOK EX6
 LIMIT OVER COLLECTION THE HEROES
 BLAZING DOMINION
 THE CHRONICLES DECK Spiritualist
 Yu-Gi-Oh OCG STORIES Volume 6
 JUMP FESTA 2026
 PREMIUM PACK 2026
 DUELIST BOX PRISMATIC SUMMON
 Yu-Gi-Oh OCG Structures Vol.11
 TERMINAL WORLD 3
 BURST PROTOCOL
 DARK
DARK LIGHT
LIGHT EARTH
EARTH WATER
WATER FIRE
FIRE WIND
WIND DIVINE
 Level 1 Best Monster
 Rank 1 Best Xyz Monster